Ah, the nostalgia of homemade treats! Every time I whip up these Homemade Little Debbies Tree, I’m transported to my childhood, especially around the holiday season. I can still hear the laughter of family gathered in the kitchen, the smell of fresh cake wafting through the air, and the excitement of decorating these delightful trees just right. These little guys not only capture the essence of Christmas but also satisfy that sweet tooth in a way that store-bought just can’t match! There’s something special about creating your own treats, and these adorable Christmas trees are a showstopper.
If you’re like me and have a soft spot for festive goodies, then this recipe is a must-try! Not only are these trees easy to make, but they guarantee smiles all around. Plus, the best part? You can let your creativity shine while decorating—and we all know that’s half the fun! So let’s dive right into making these sweet trees.
What’s in Homemade Little Debbies Tree?
Yellow Cake Mix: This is the base of our trees. You can use a box mix for convenience, but feel free to whip up your favorite vanilla cake recipe if you’re feeling adventurous!
Large Eggs: These will help bind everything together and give the cake its fluffy texture.
Vegetable Oil: Adds moisture to the cake, keeping it soft and tender. I prefer using canola oil, but any neutral oil will work.
Water: This is necessary to prepare the cake mix. It’s what helps everything come together smoothly.
Vanilla Frosting: This sweet goodness is what holds our trees together! Store-bought is a time-saver, but you can always make your own if you want that homemade touch.
Red Decorating Icing: This will be the perfect touch to drizzle over our trees, adding that festive flair!
Green Sprinkles: These are the decorations! Think of them as the ornaments for your cake trees.
Vanilla Extract: A splash of this will give our cake a delightful aroma and flavor—totally optional but highly recommended!
Additional Green Frosting: More fun, more color! If you want to get extra creative, you can use this for even more decoration.
Is Homemade Little Debbies Tree Good for You?
Well, let’s be real; these treats are not exactly health food, but everything in moderation, right?
Cake Mix: While it’s an easy way to make delicious cakes, it does pack in some sugar and preservatives. Consider looking for a brand with fewer additives if that’s a concern.
Frosting: The sweet star of the show, yet rich in sugar and fats. Use it sparingly, or swap for a lighter version of frosting if you’re cutting back.
Sprinkles: They may not contribute much nutritionally, but they do add a pop of fun and color, making these treats irresistible, especially for kids.
All in all, these trees are a festive indulgence that brings joy more than anything else. Perfect for sharing with friends and family!
How to Make Homemade Little Debbies Tree?
1. Preheat the oven to 350°F (175°C). Grease and flour a baking sheet or line it with parchment paper for easier cake removal. Trust me, it makes life way easier!
2. In a large bowl, prepare the yellow cake mix according to package instructions. This is where you’ll mix in the eggs, vegetable oil, and water until you have a smooth batter. Mix it like you mean it—fluffiness is key!
3. Pour the batter onto the baking sheet, spreading it out evenly so that all the trees can have a fair chance to rise beautifully.
4. Bake in the preheated oven for about 20-25 minutes, or until you can poke a toothpick in the center and it comes out clean. Don’t rush this step; it’s all about that perfectly baked cake!
5. Once the cake has cooled completely (which is the hardest part, right?), grab a Christmas tree cookie cutter and cut out charming tree shapes from the cake.
6. Place half of your tree shapes on a wire rack or a plate. Spread a generous amount of vanilla frosting on top of each shape—get artsy with it!
7. Take the remaining tree shapes and place them on top of the frosted ones to create your delicious “sandwiches.”
8. Use any leftover frosting to cover the top of each tree sandwich, making sure they look absolutely delightful.
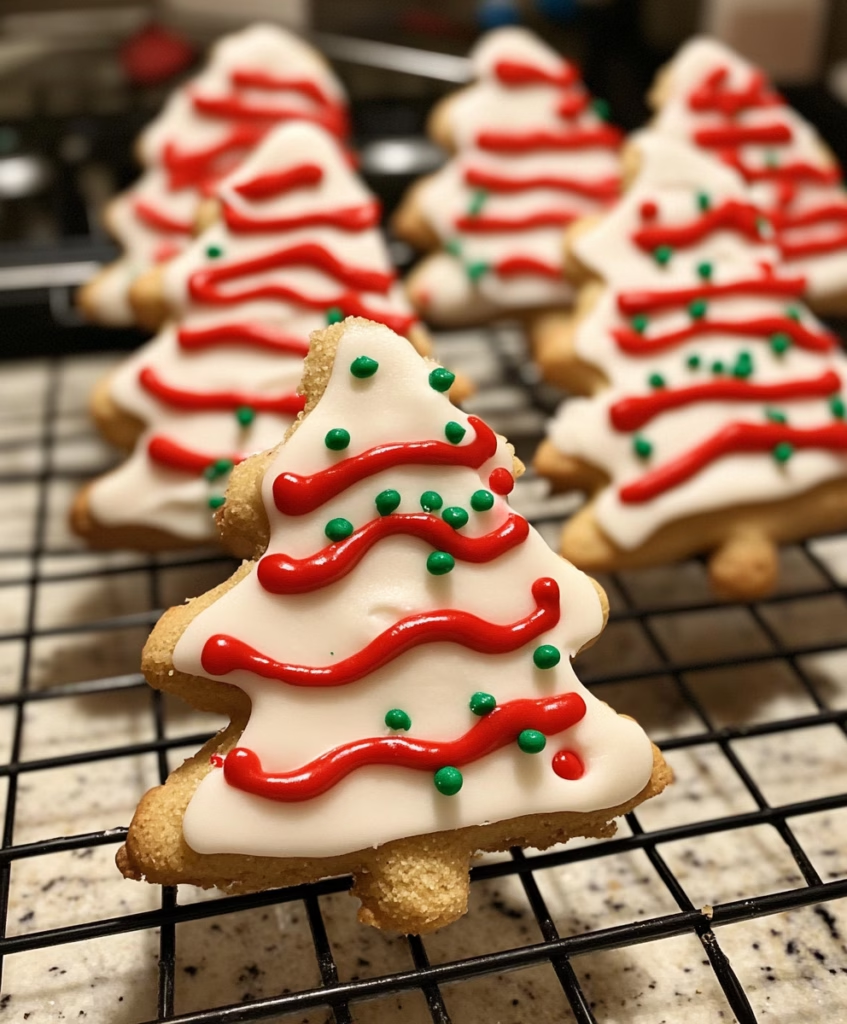
9. Drizzle red decorating icing over the top in a fun zigzag pattern—this is where you can really show off your skills!
10. Finish them off with a sprinkle of green sprinkles to mimic those beautiful Christmas tree decorations.
11. Let the decorations set for a few minutes before digging in. You want your guests to admire your work first!
Creative Touches for Your Holiday Trees
– You can store these cute trees in an airtight container for up to a week. Just be prepared—there won’t be many left after your first gathering!
– Feel free to mix and match colors of icing and sprinkles for a super festive look!
– If you’re feeling extra fancy, use gel icing for those vibrant colors and clean drizzles—it’s the true icing on the cake!
I hope you give these Homemade Little Debbies Trees a try! They’ve become a Christmas tradition in my home, and I know they’ll bring warmth and smiles to yours, too. Don’t forget to share your tree creations with me! Happy baking!


